Made to Measure • Online Quotes • Technical Support
Secondary Glazing Made Simple
• Easy DIY Installation
• Reduce Heat Loss
• Cut Outside Noise
• Save On Energy
• Delivery Within 10 Days*


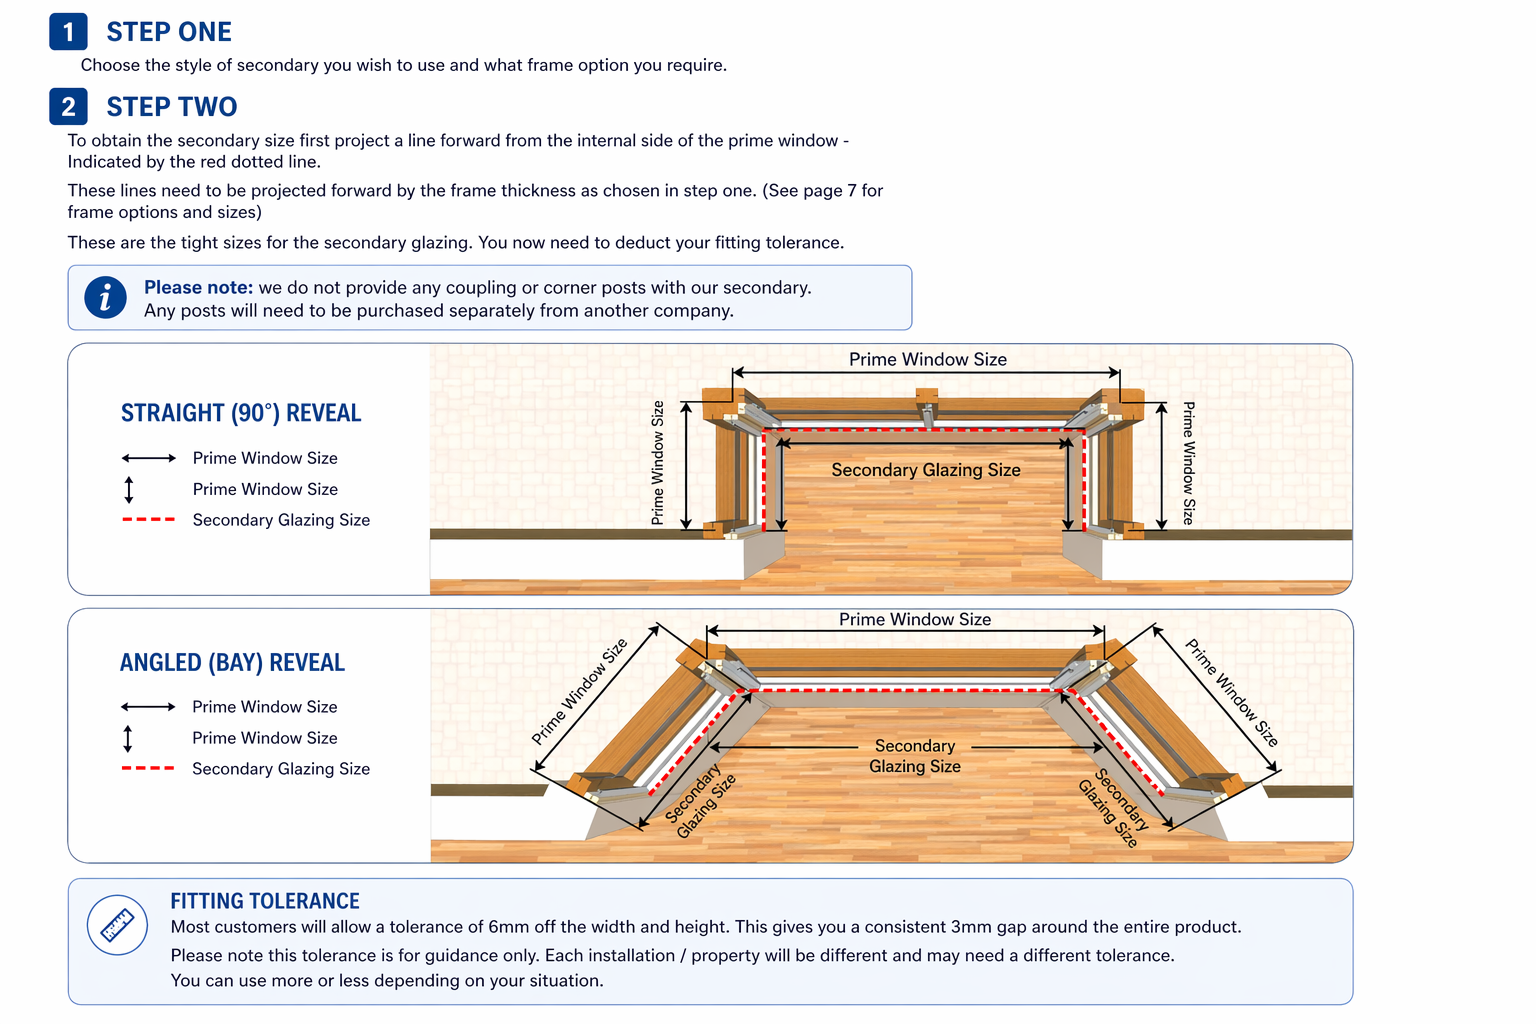
This guide is here to help you take clear, practical measurements for your secondary glazing. Whether you are measuring inside the reveal, fixing over the reveal, matching existing bars or planning a bay window, the aim is to make the process straightforward and easy to follow.
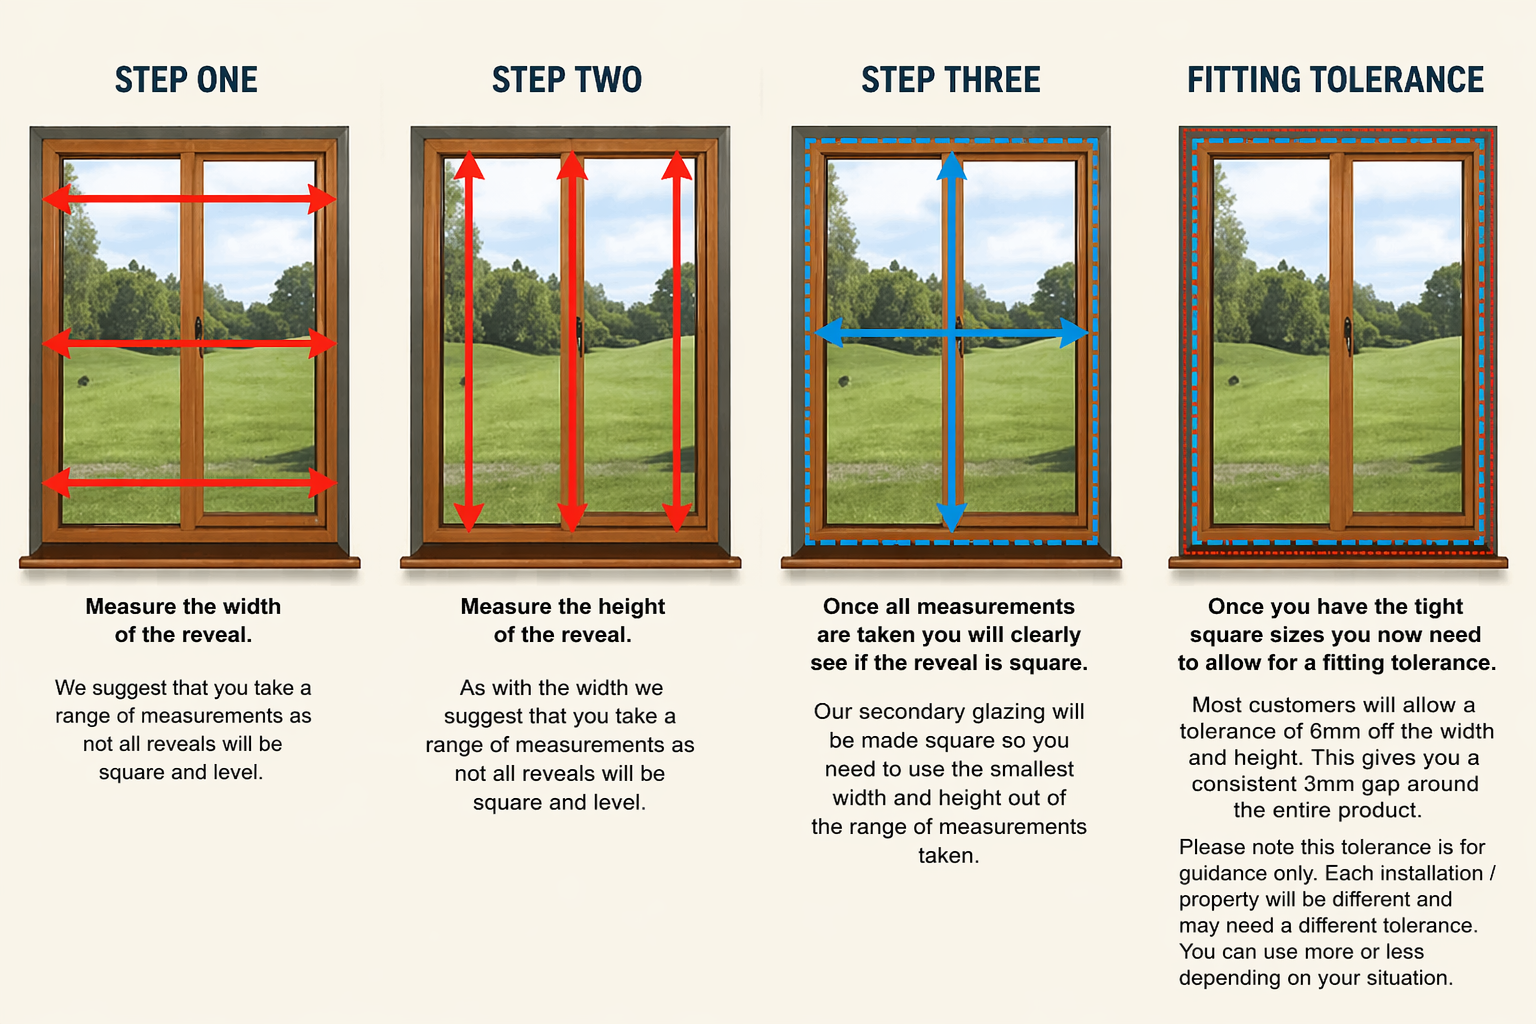
Every opening is slightly different, so use this page as a practical guide and always apply your own judgement on site. Where needed, take several measurements, check for out-of-square openings, and work from the tightest sizes.
Have the right approach before you pick up the tape measure.
For installations where the secondary glazing sits inside the existing reveal.
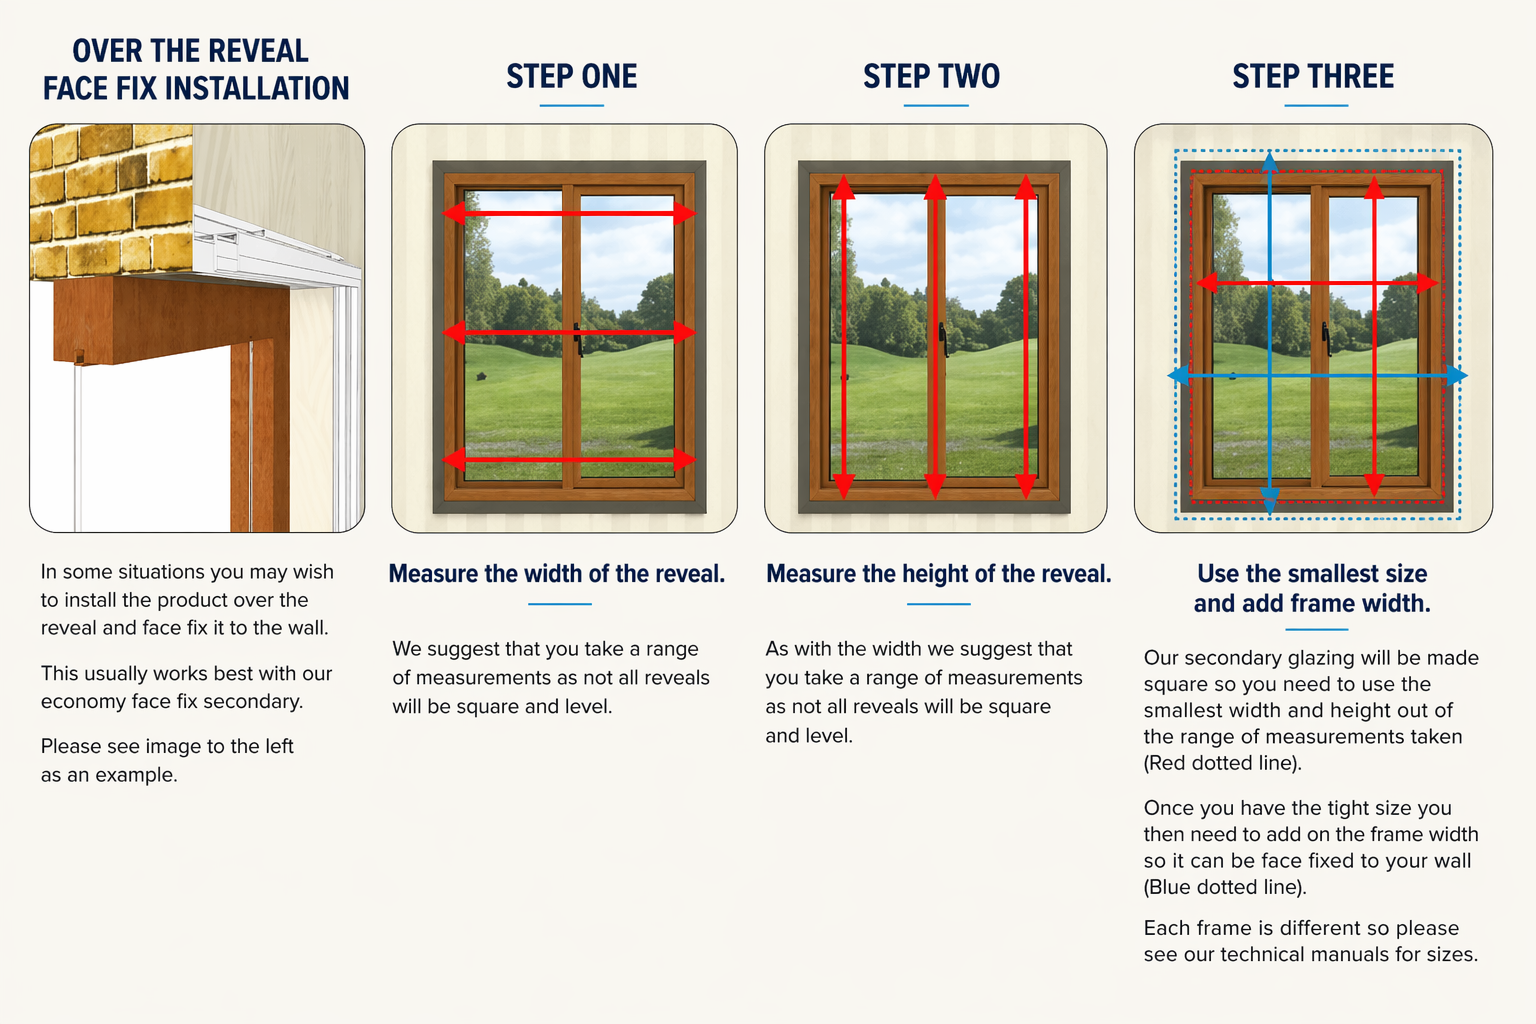
For installations where the secondary glazing is face fixed over the opening.
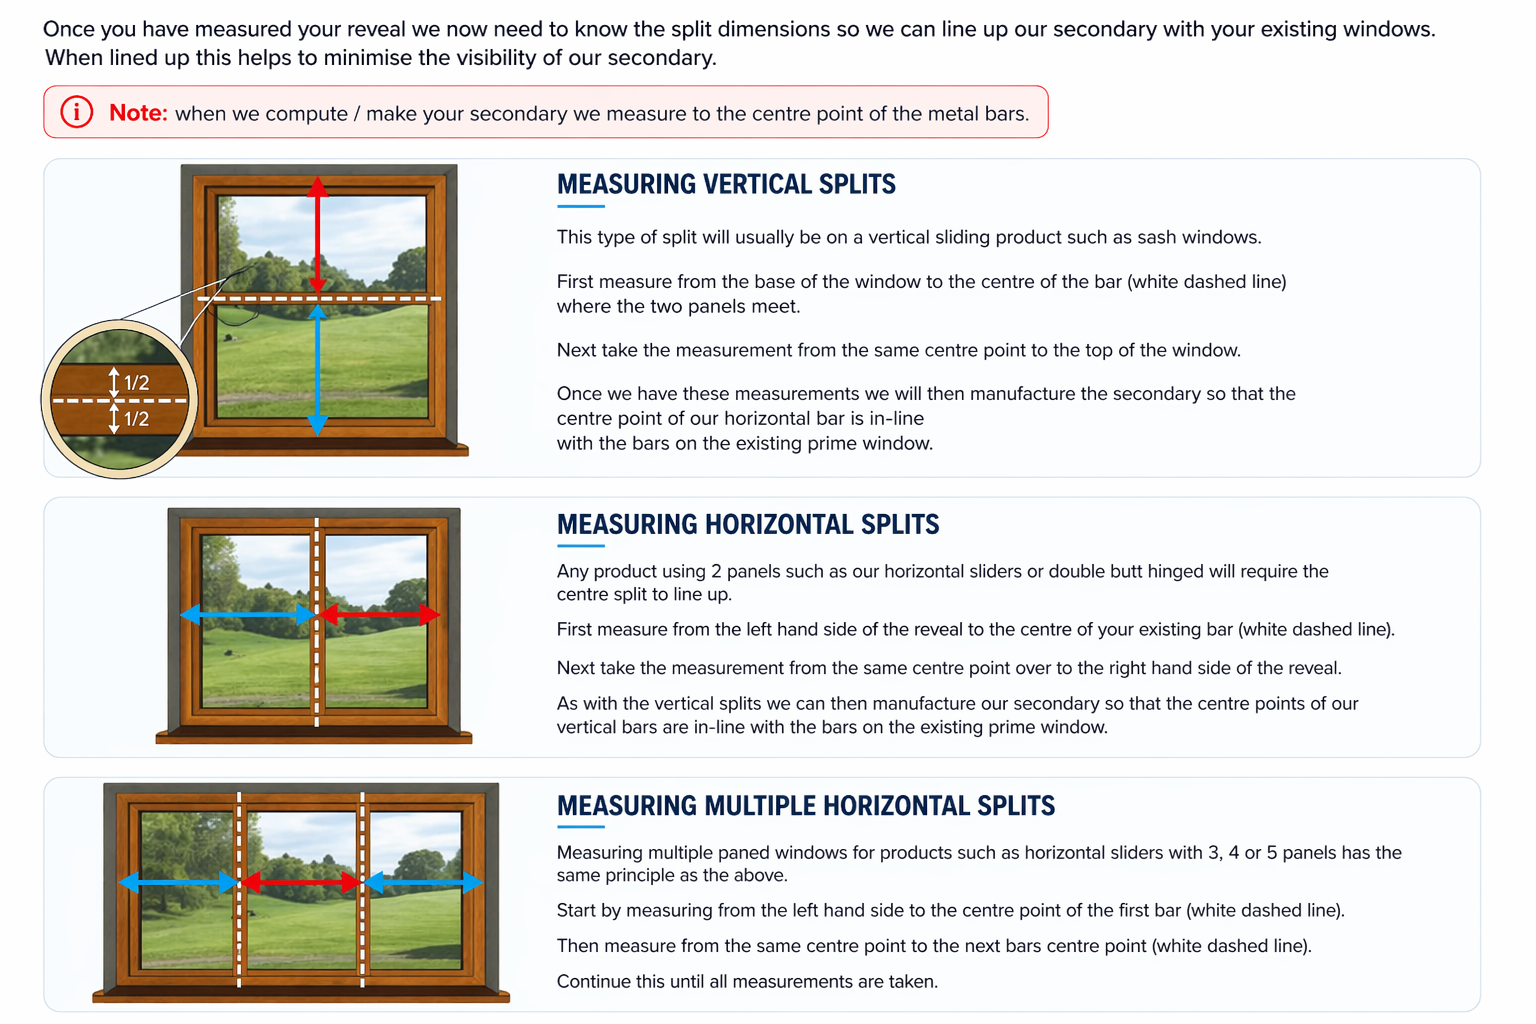
Used where bars need to align with the existing prime window.
Plan each section carefully before arriving at final secondary sizes.
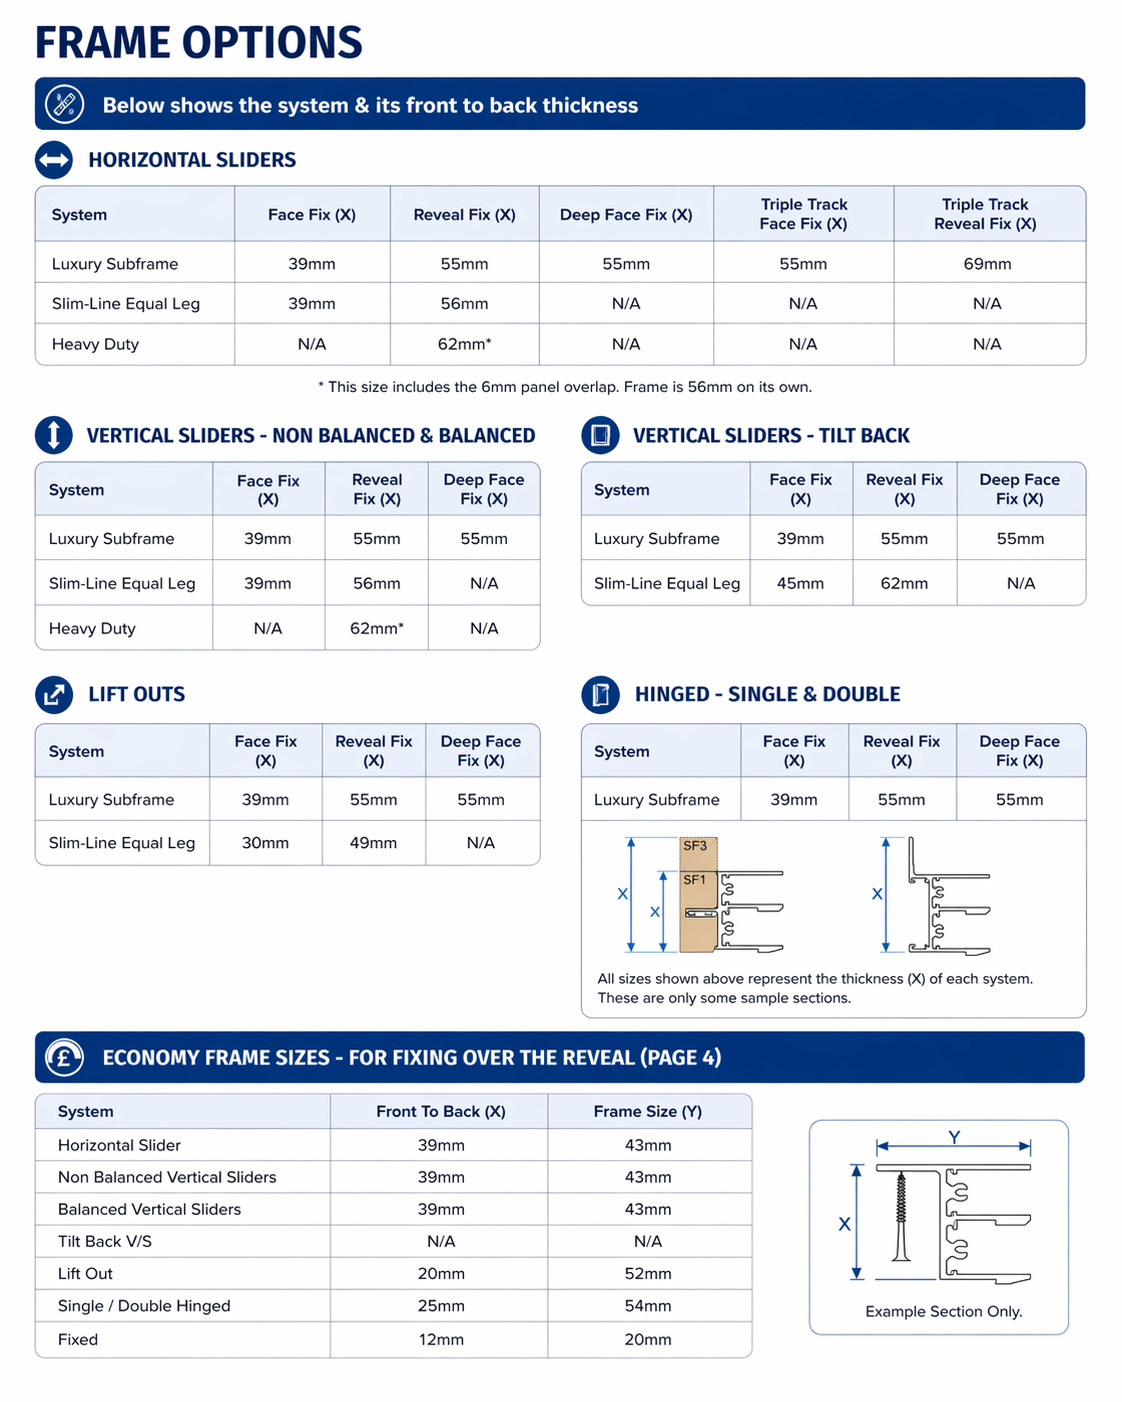
A simple quick-reference section for common frame options.